This guide shows you how to set up a VPN on different devices.
Setting up a VPN is a great option if you’re looking for a way to improve your online privacy and security. But with so many different devices and operating systems out there, it can take time to figure out where to start.
Each device type has nuances in its VPN setup protocol, but it’s all pretty intuitive.
However, following this guide is sure to save you some time and possible headaches.
Here’s how to set up a VPN on Apple devices:
We will get to how to set up a VPN profile soon. But first, you need to get a VPN service. Here’s how:
- Sign up for a VPN
- We recommend our VPNs because we know we’re awesome. But there are plenty of worthy alternatives.
- Download and install the app
- Go to the provider’s website and download the app for your Mac. Open the app and log in.
- Connect to a server
- Choose a server location and click the Connect button. Your Mac will now be connected to the internet via the VPN server.
- Browse the internet
- You can now browse the internet securely and privately.
How to set up a VPN profile on your iPhone or iPad.
If you know your login information, you can set up a VPN client on your iPhone or iPad by hand. Don’t worry – it’s not as complicated as it sounds.
Before we get started, know that there are two types of VPNs:
A remote-access VPN lets users connect to a network that is far away, like a network at home or the office.
A site-to-site VPN connects multiple fixed sites via a public network like the Internet.
When setting up a VPN profile, you create a remote-access VPN connection.
- Open the Settings app on your iPhone or iPad, and tap the General category.
- Tap VPN near the bottom of the list. If a configuration profile is installed, the VPN button is replaced by something like Config Profile or “Your Company.” Tap the identifier to display the VPN configuration screen.
- Tap Add VPN Configuration to add your first VPN configuration. If you have existing VPN configurations, tap the Add Configuration button.
- Select your VPN type from IKEv2, IPSec, or L2TP.
- Enter the VPN settings information, including the description, server, and remote ID. If your VPN of choice doesn’t offer an iOS app, you’ll probably need a server address, your account name, and the account password from your VPN provider.
- The remote ID is sometimes called the service name. It’s the URL for the VPN server you’re connecting to.
- Enter your authentication login, including your username, password, and shared secret.
- If your VPN provider sent you a configuration profile or server configuration file, you could open it with the Configurator app to have the VPN settings automatically entered.
- When you’re done entering your configuration information, tap Done.
- You can enable the VPN connection by toggling the Status switch.
- Once your VPN is set up, you can connect to it by going to Settings > VPN.
How to set up a VPN profile on your Mac.
If you’re using a Mac, you can use the built-in network settings to connect to a virtual private network. Your networking options on a Mac are organized into logical “locations.” The default location is Automatic, connecting to the most recently used network environment.
You can set up a VPN location using System Preferences > Network.
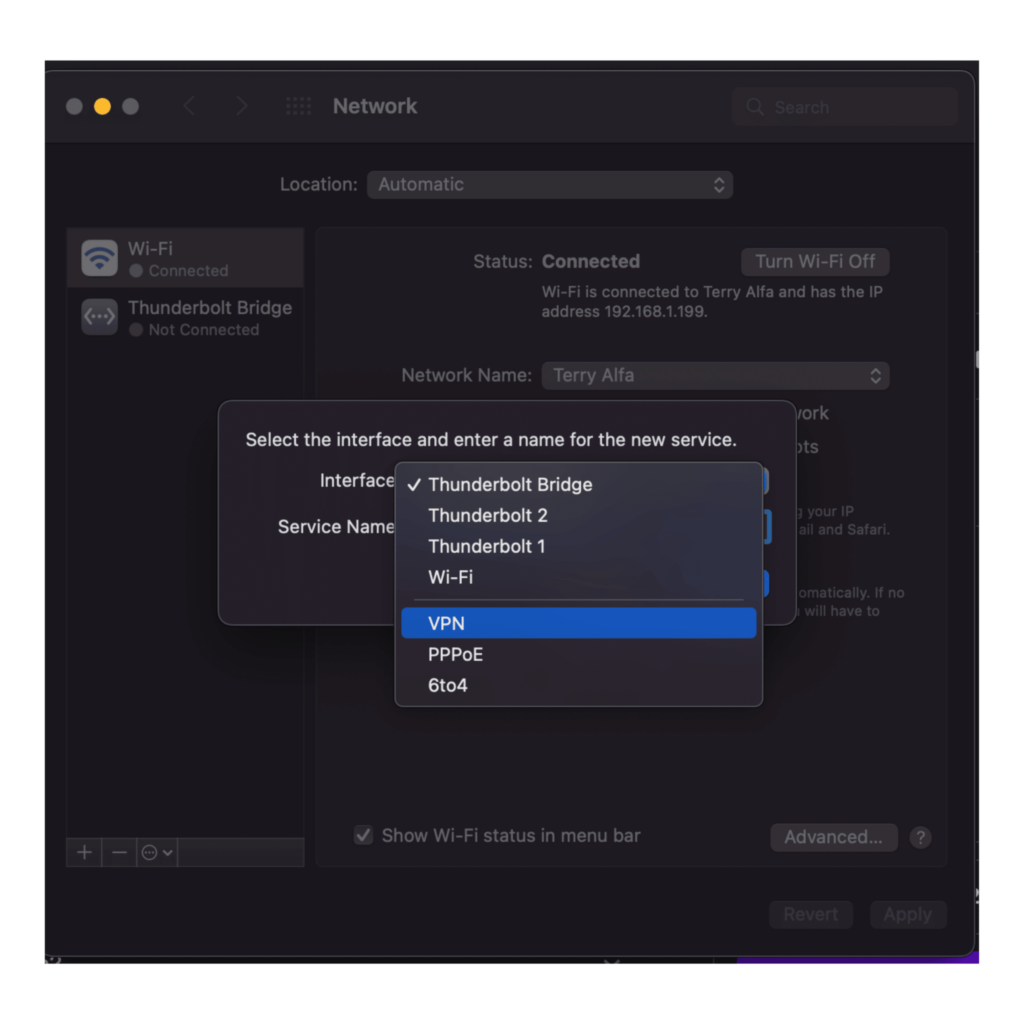
- Click the + button to create a new network location, and give it a name.
- Click the Interface drop-down menu and select VPN.
- From the VPN Type dropdown menu, select the type of VPN you want to connect to, like IPSec or L2TP.
- Enter the VPN settings information you received from your network administrator or VPN provider. This includes the server name or address, remote ID, local ID, shared secret, and authentication method.
- When you’re done, click Create.
- Select the VPN network location you just created to connect to the VPN.
How to set up a VPN profile on Windows PC.
If you’re using a Windows PC, you can use the built-in VPN client to connect to a VPN. Here’s how to do it.
Open the Network and Sharing Center from the Control Panel.
Click the Change adapter settings link.
Select the VPN connection you want to use and click the Connect button.
Enter your VPN credentials, and click Connect.
How to set up a VPN on Windows 10.
Select the Start button, then select Settings > Network & Internet > VPN. In the VPN settings window, select Add a VPN connection. In the Add a VPN Connection window, do the following:
- For a VPN provider, choose Windows (built-in).
- In the Connection name box, please enter a name you’ll recognize (My Personal VPN).
- In the Server name or address box, enter the VPN server address.
- Choose the type of VPN connection you want to create for VPN type.
- Depending on the VPN, you might need to enter additional settings, such as the name of the VPN, the server name or address, your username, and your password.
- When you’ve entered all the required information, select Save.
- After you create the VPN connection in Windows 10, here’s how to use the connection:
- On the left side of the Settings window, select the VPN connection you want to use, then select Connect.
- Enter your sign-in credentials if prompted, then select OK to finish connecting.
How to set up a VPN on an Android.
Configuring a VPN on your Android device may sound daunting, but it’s quite simple. The process is similar to setting up any other type of profile on your device, and you can even use a pre-configured VPN profile if your provider offers one.
To set up a VPN on your Android device, follow these steps:
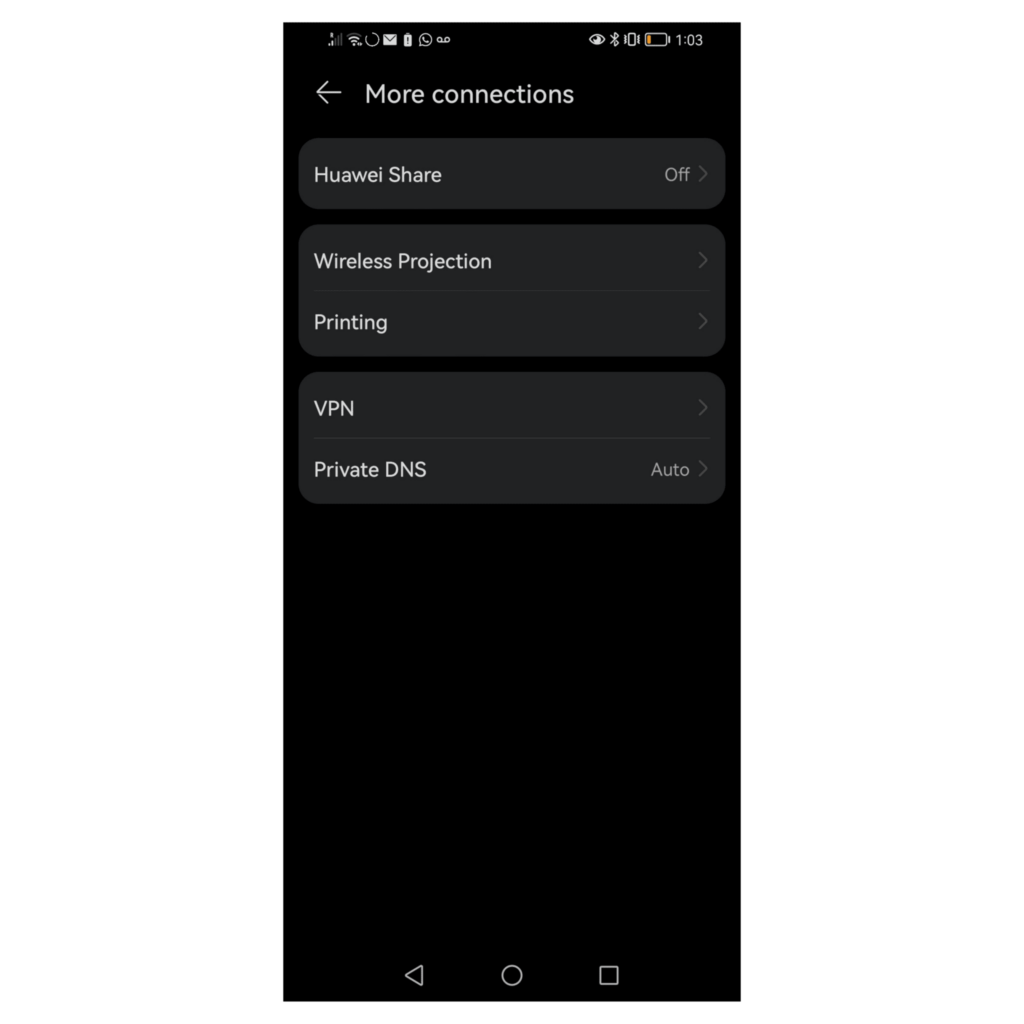
- Open the Settings app and tap on the Network & Internet option. Various Android brands use different words. For instance, you may see it called More connections.
- Tap on the VPN option.
- Tap on the Add VPN Profile button.
- Enter the VPN profile information. This includes the VPN provider name, server address, and any other required information.
- Tap on the Save button.
- Enter your VPN credentials when prompted.
- Tap on the Connect button.
Your Android device is now connected to the VPN.
What to do if your VPN doesn´t work.
There are a few things you can try if your VPN is not working:
- Restart your computer or device.
- Check if your VPN is still connected.
- Try connecting to a different server.
- Check if your firewall is blocking the VPN.
- Contact your VPN provider for help.
Wrapping up.
A virtual private network can make you seem like you’re on another network, making it easier for you to access resources you might not be able to otherwise. A VPN puts your traffic in an encrypted tunnel so that your ISP can’t see it, and it also encrypts the traffic inside the tunnel so that your ISP’s DNS server can’t read it.
You can use a VPN to access websites that might be blocked in your country or to access a network at work or school. You can also use a VPN to keep your web traffic private from your ISP and other third-party snoops.