Set up Viscosity on Windows 7/8/10
Viscosity is a premium VPN software. It’s the most stable OpenVPN client on Windows.
Recommendations
Requirements
- Operating System- Windows 7/8/10
- Unrestricted Internet.
Leak Prevention
Connect to VPN with Viscosity
1. Get Viscosity
Note: If you have already installed the app, then you can skip this step.
Install Viscosity from here: Install Viscosity

2. Get OpenVPN credentials for your IP address
Viscosity uses OpenVPN protocol. Find your OpenVPN credentials from your Service Page.
Further steps shows how to get credentials for:
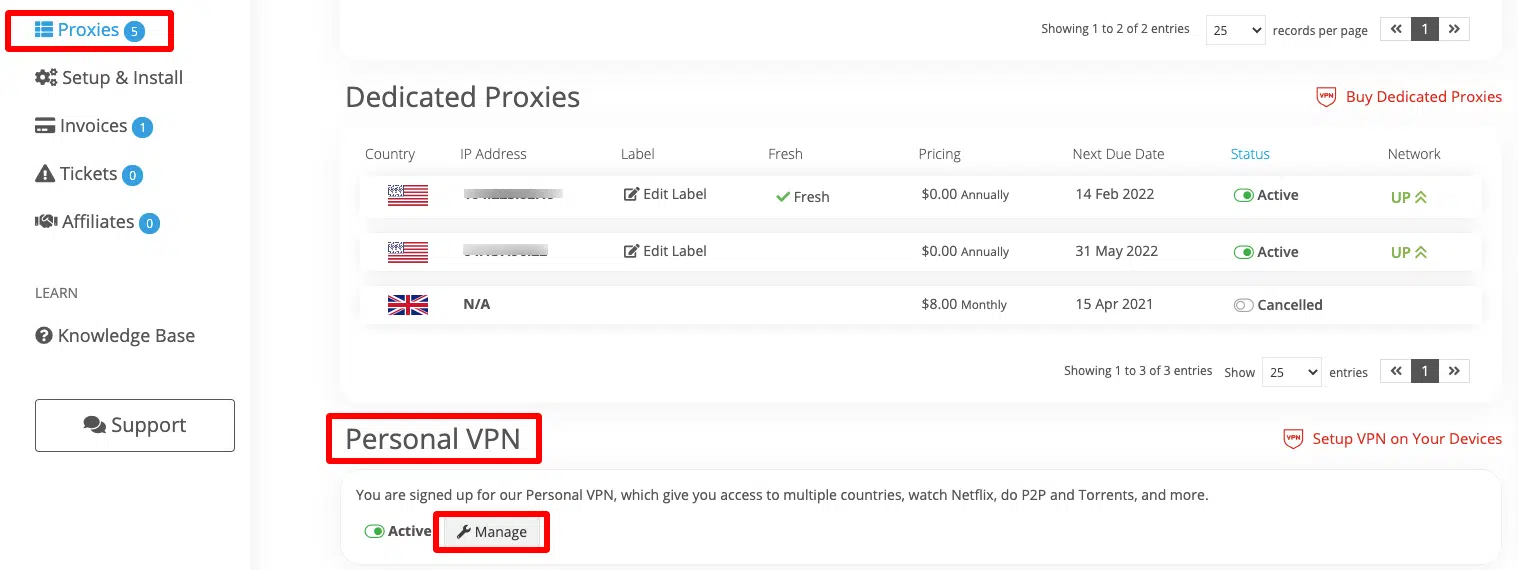
Login to your account, and find the IP address/Service you want to use.

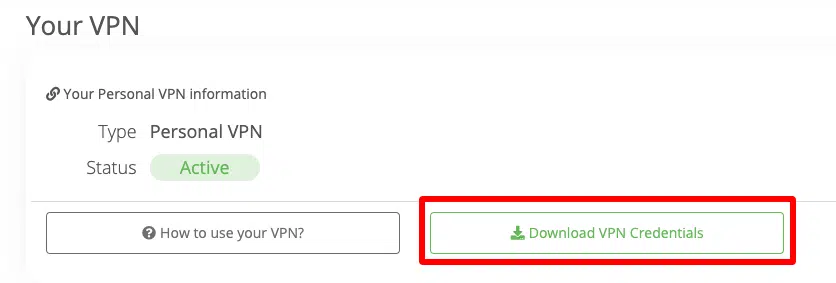
Select OpenVPN under Proxy Credentials and click the download icon.

This will download a profile file for your proxy.


3. Connect to VPN
Open the downloaded Credentials file and let it import into Viscosity.
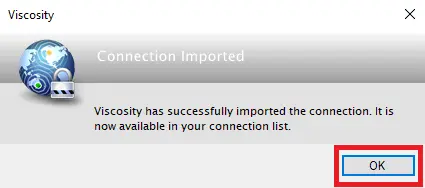
As the installation finishes, IPBurger will start automatically and you will see it in the Tray icons. You can connect to your VPN from there.
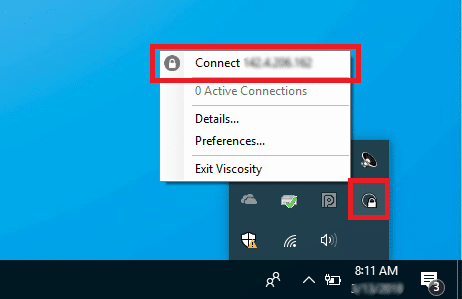
Now you are connected to IPBurger VPN.
If you are having issues connecting, please contact our Support, we are happy to help!
Next Steps
Auto-Connect
You can set up your VPN to automatically connect when you log into your computer.
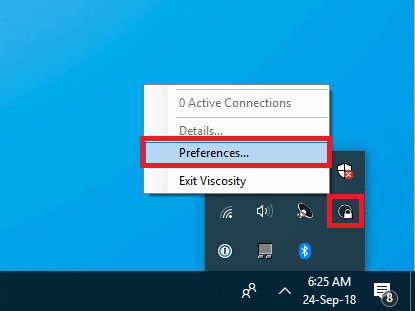
Click on the Viscosity icon and go to Preferences.
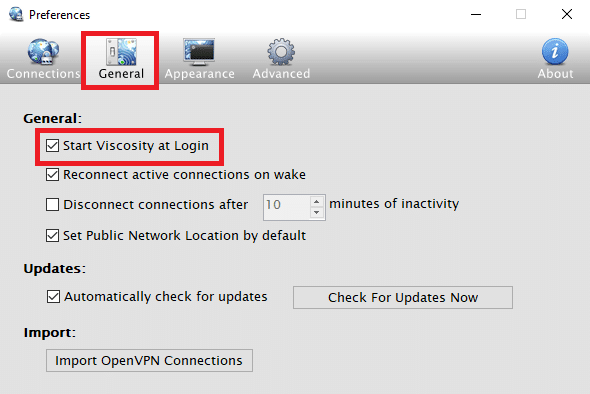
Go to General tab and tick the Start Viscosity at Login.
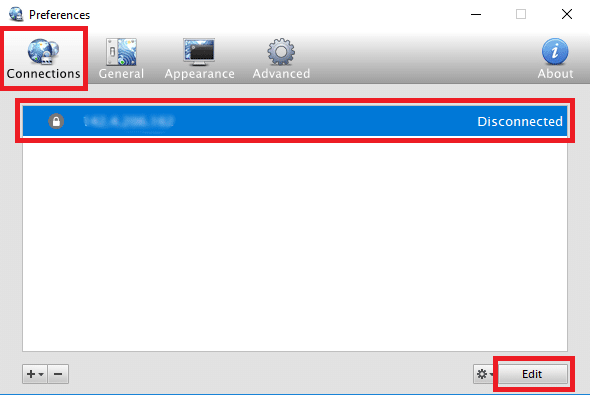
Switch back to the Connections tab, select the connection, and click on Edit.
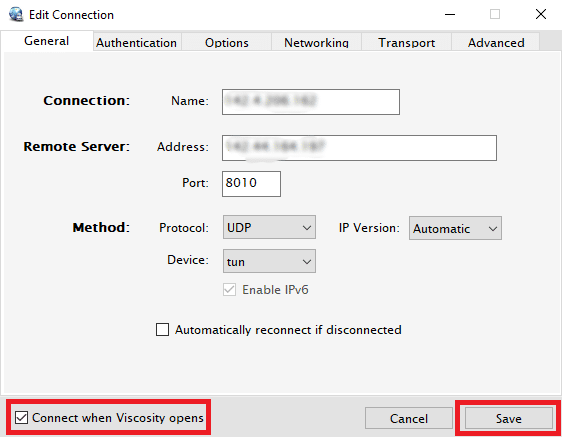
Enable Connect when Viscosity opens and click Save.
Kill Switch
Kill Switch blocks you from exposing your Real IP Address, if the VPN Connection ever drops.
To Setup, please follow the guide below:
Perform Leak Tests
Please follow:
Multiple Accounts
You can easily set up multiple Business Accounts with Multiple IP Addresses from IPBurger.
Please follow:
For any queries, feel free to reach out to our Support, we are happy to help!