Set up L2TP/IPSec on Windows 10/11
L2TP/IPSec is a widely used legacy VPN Protocol and it supports most operating systems. It is very easy to set up directly on the OS and doesn’t require any additional software installation.
Requirements
- Operating System- Windows 10/11
- Unrestricted Internet.
Leak Prevention
Connect to VPN with L2TP/IPSec
1. Get L2TP/IPSec Credentials for your IP address
L2TP/IPSec uses L2TP/IPSec protocol. Find your L2TP/IPSec Credentials from your Service Page.
Further steps shows how to get credentials for:
Login to your account, and find the IP address/Service you want to use.

Select L2TP/IPSec under Proxy Credentials.
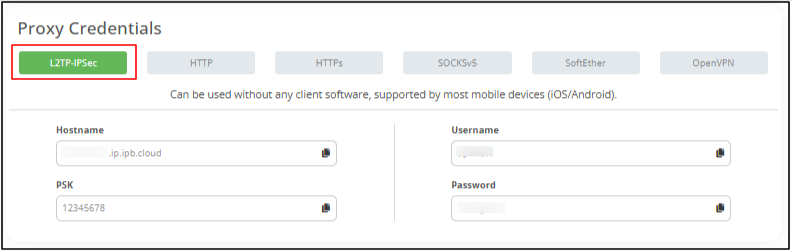
These are your VPN Credentials.
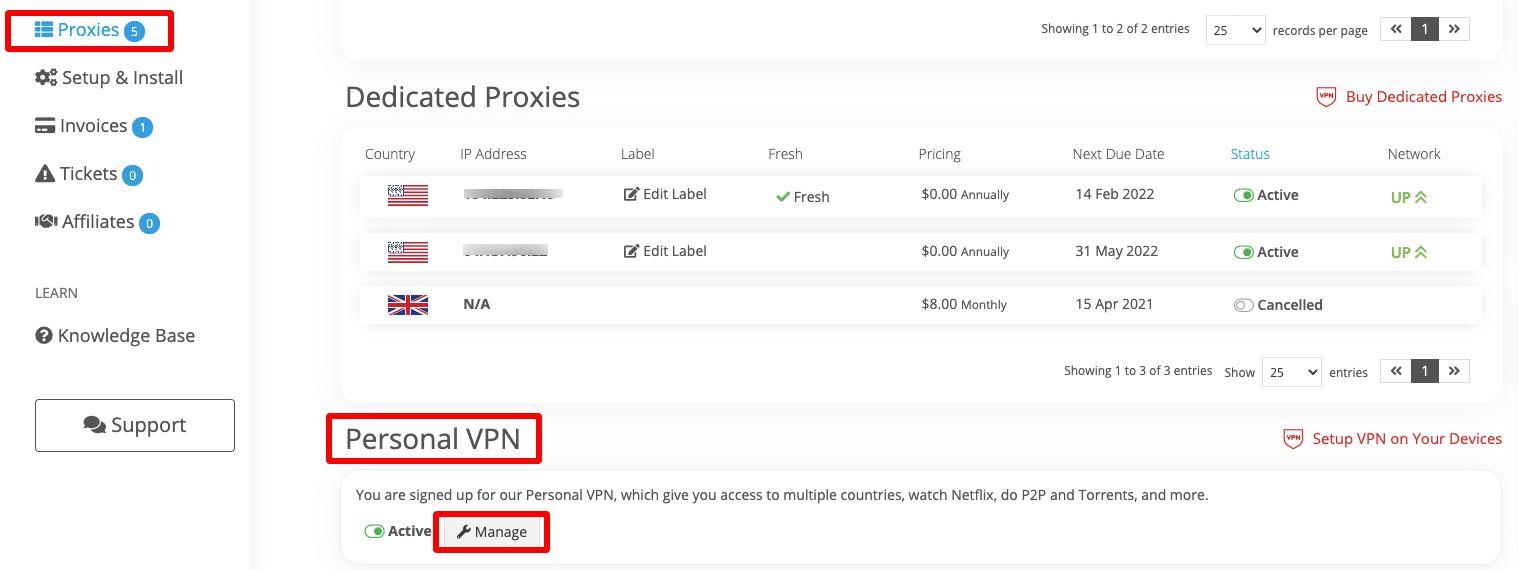
Access your VPN Service here. Click on the Manage button.
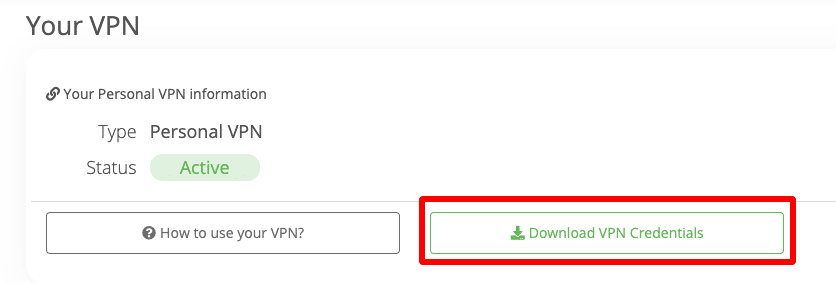
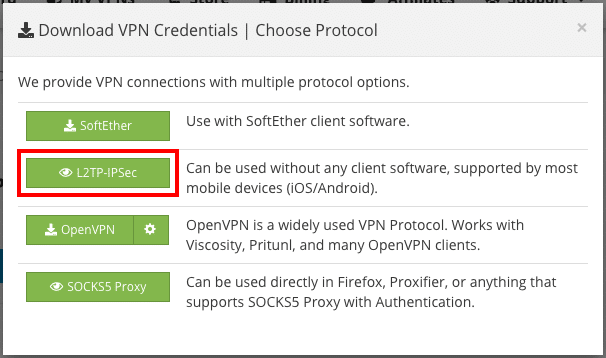
Click on the Download VPN Credentials button and select L2TP/IPSec.
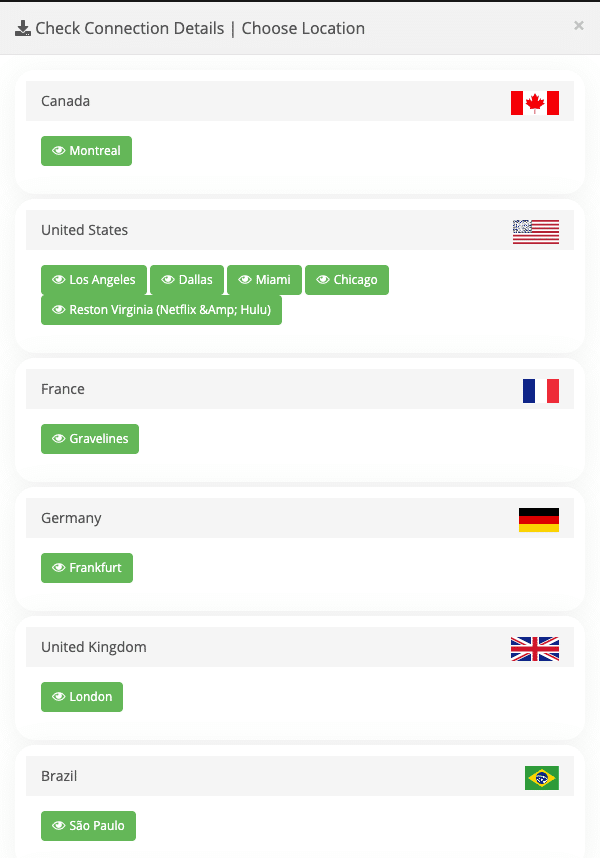
Select a location.
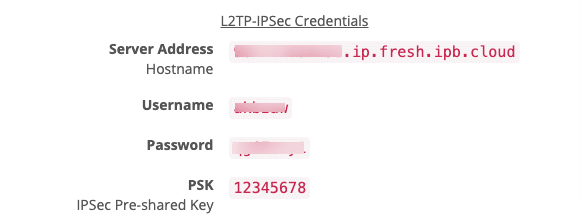
These are your VPN Credentials.
2. Configure L2TP/IPSec in Windows
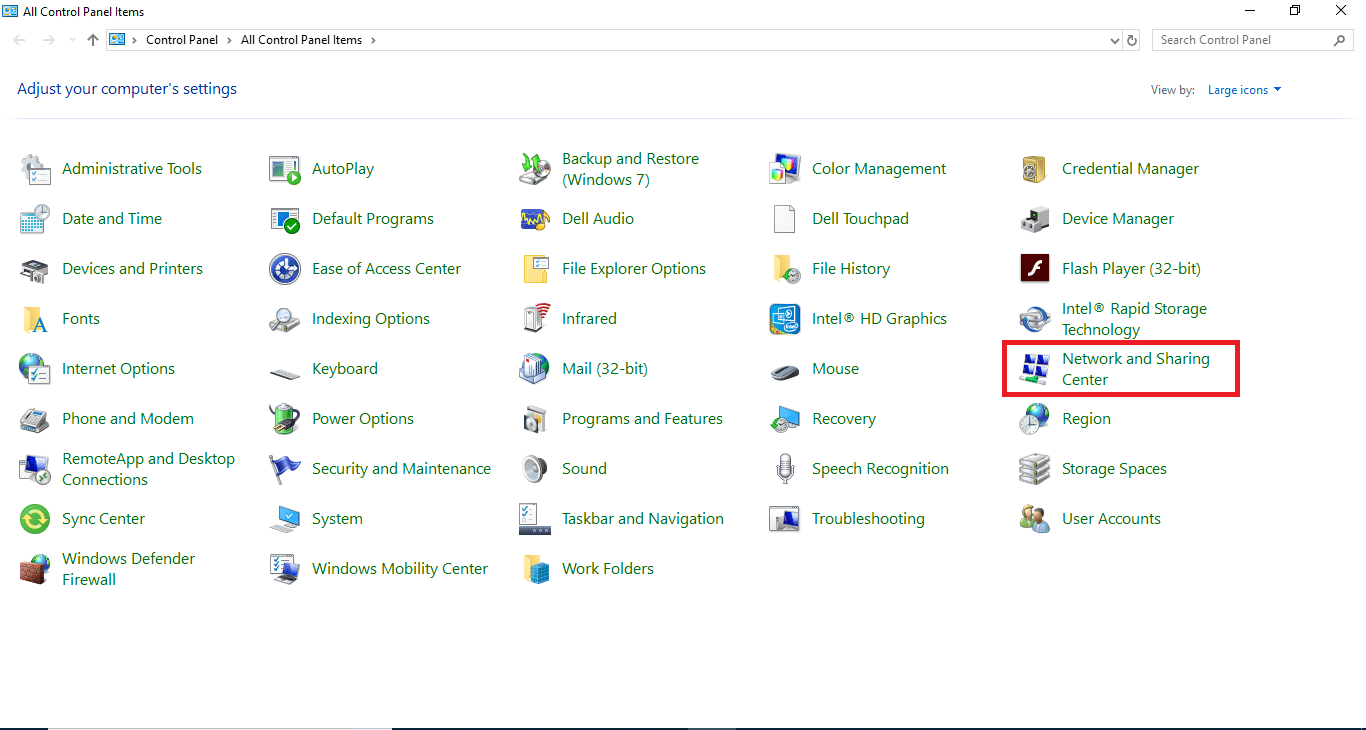
Go to Control Panel and open the Network and Sharing Center menu.
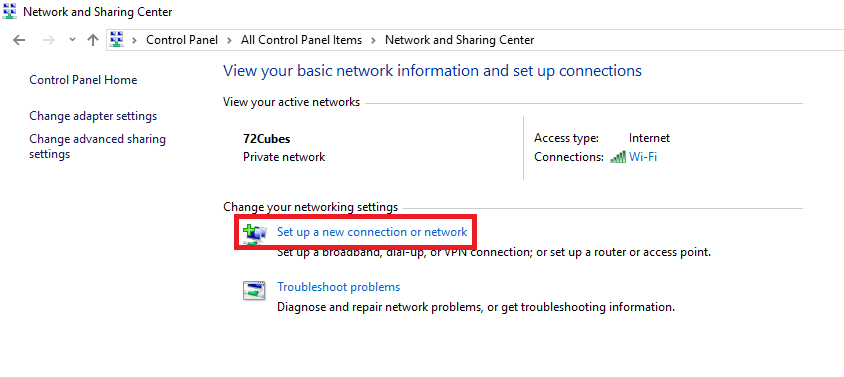
Click on the Set up a new connection or network link.
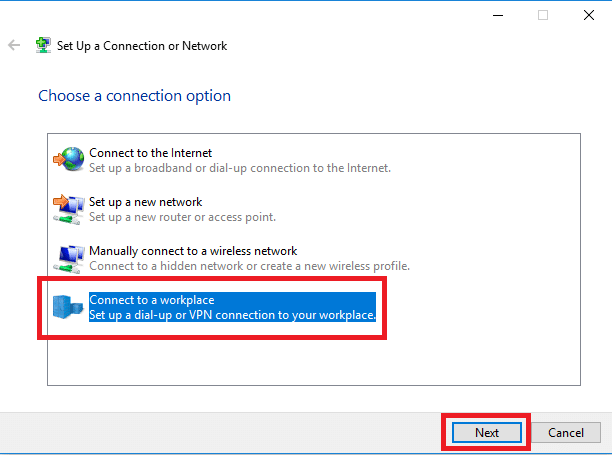
Select the Connect to a workplace and click Next.
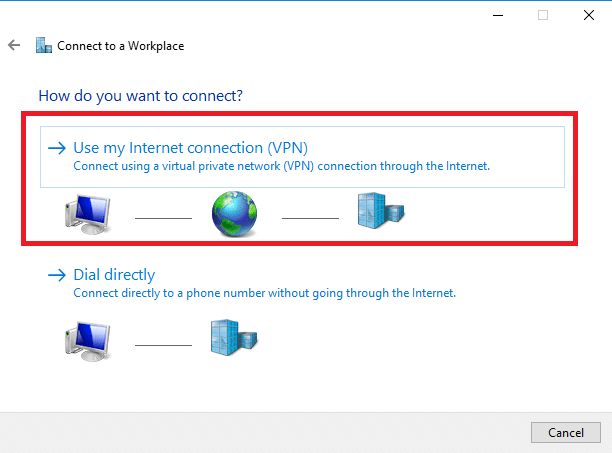
Select the Use my Internet Connection (VPN) option.
Copy-paste the Internet Address (Host Name) from your L2TP/IPSec Credentials. Provide some friendly Destination Name, like IPBurger, and click Create.

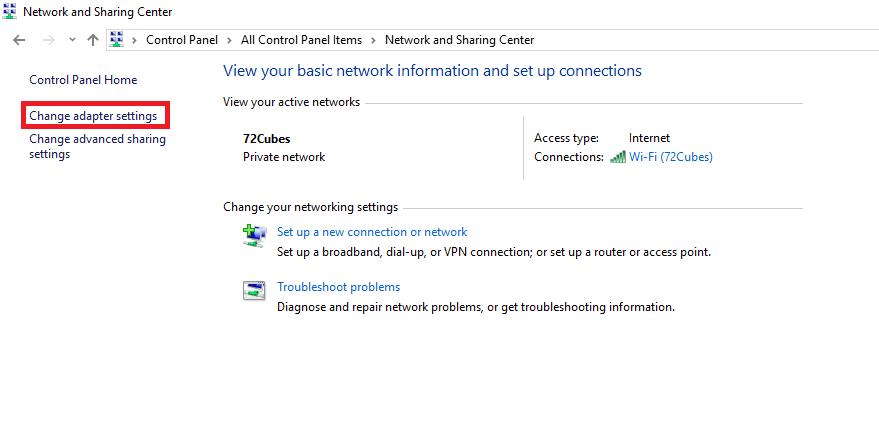
Open the Network and Sharing Center again and select the Change adapter settings.
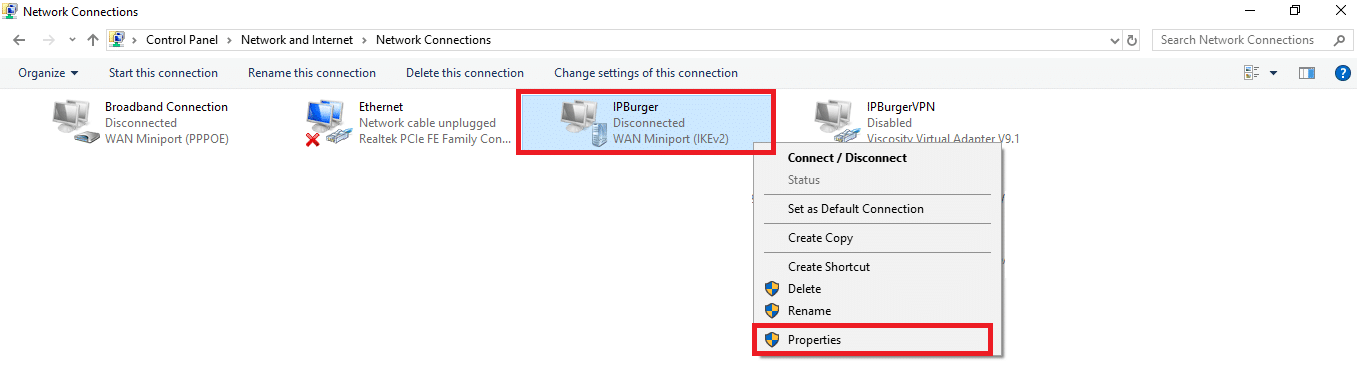
Right-click on the new connection that you have just created. It should appear with the name you have given in the previous step. Click on the Properties option.
Select Properties.
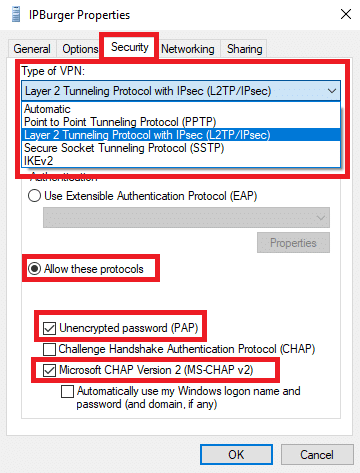
Navigate to the Security tab and do the settings as shown below.
- In the Type of VPN, choose Layer 2 Tunneling Protocol with IPsec (L2TP/IPsec)
- Select the Allow these protocols.
- Tick the Unencrypted password (PAP)
- Tick the Microsoft CHAP Version 2 (MS-CHAP v2)
Double-check all the settings as they are crucial to connect to your VPN.
On the same window, click on Advanced Settings.
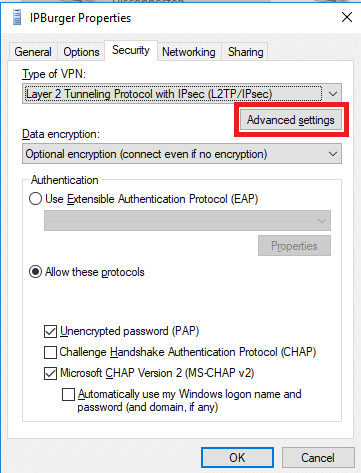
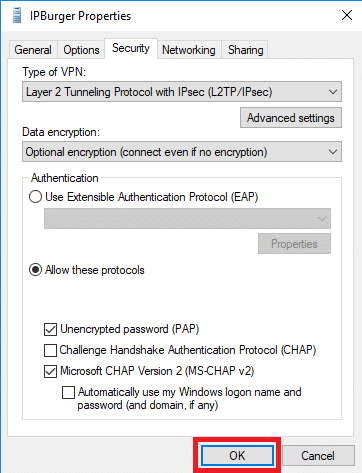
Select Use preshared key for authentication, copy-paste the data from your L2TP/IPSec Credentials, and click OK.

3. Connect to VPN
Open the WiFi menu from the bottom tray.
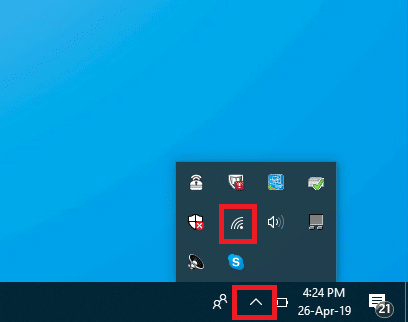
Click on the VPN connection we created and connect to it.
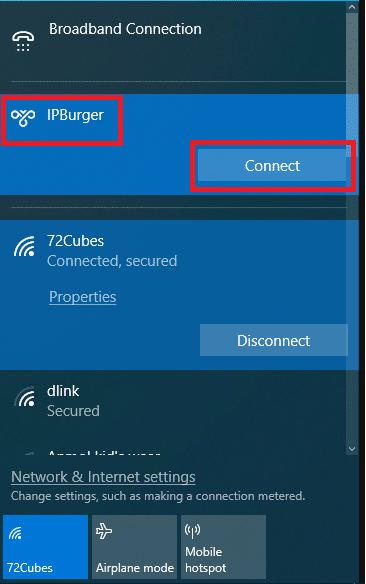
Copy-paste the Username and Password from your L2TP/IPSec Credentials.
If it does not connect or takes too long to connect, open the Settings from the Start menu.

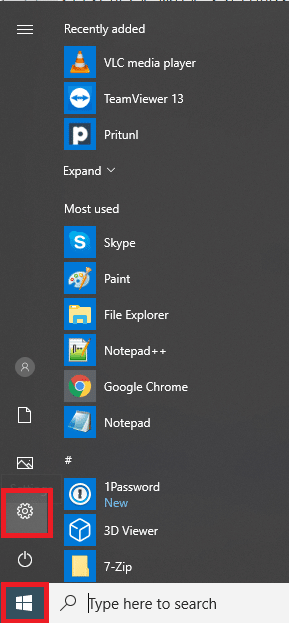
Select Network & Internet.
Select VPN in the left panel and click on the VPN ‘IPBurger’ we just created and click on connect. Enter username and password when asked for. It should connect well.
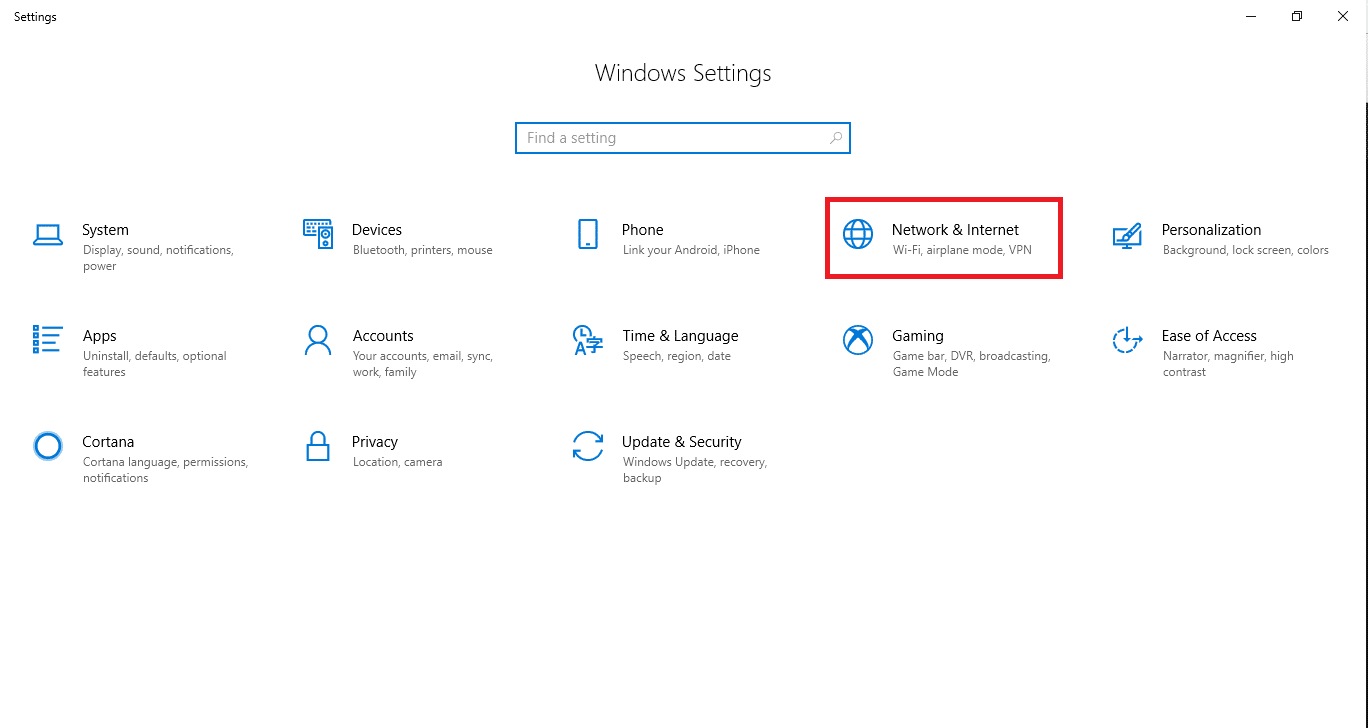
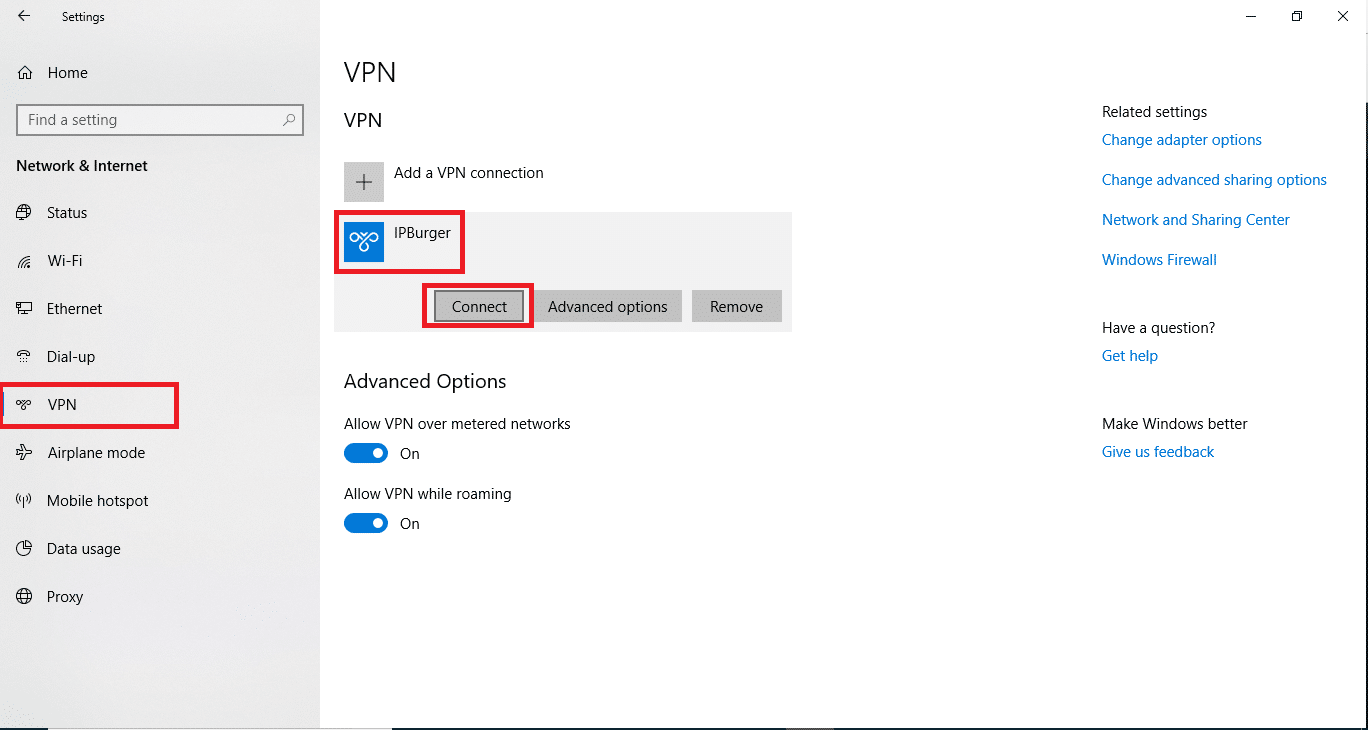
Now you are connected to IPBurger VPN.
If you are having issues connecting, please contact our Support, we are happy to help!
Next Steps
Kill Switch
Kill Switch blocks you from exposing your Real IP Address, if the VPN Connection ever drops.
To Setup, please follow the guide below:
Perform Leak Tests
Please follow:
Multiple Accounts
You can easily set up multiple Business Accounts with Multiple IP Addresses from IPBurger.
Please follow:
For any queries, feel free to reach out to our Support, we are happy to help!