Kill Switch for Proxies
A Kill Switch protects you from revealing your identity when your proxy connection drops accidentally.
Our browser extensions have a built-in Kill Switch functionality. Once you have configured the extension, you don’t need to do anything else. However, if you will use other applications, you need to enable Kill Switch as shown in this guide.
Currently, we have Kill Switch support only for Windows and Android.
Kill Switch for Windows XP and higher versions
There is a special software that we use for the Kill Switch which is very easy to configure, tiny in size (500KB), and very light on the system resources.
This software does not disconnect you from the internet, but it automatically kills the configured web browsers, so you cannot access the stealth accounts.
Download it here: VPNCheck- the Killswitch Software for Windows
Install the software once downloaded.
You may require to install the .Net 2.0 framework for the software to work. For Windows XP users, download it here: .Net 2.0 for Windows XP 32bit
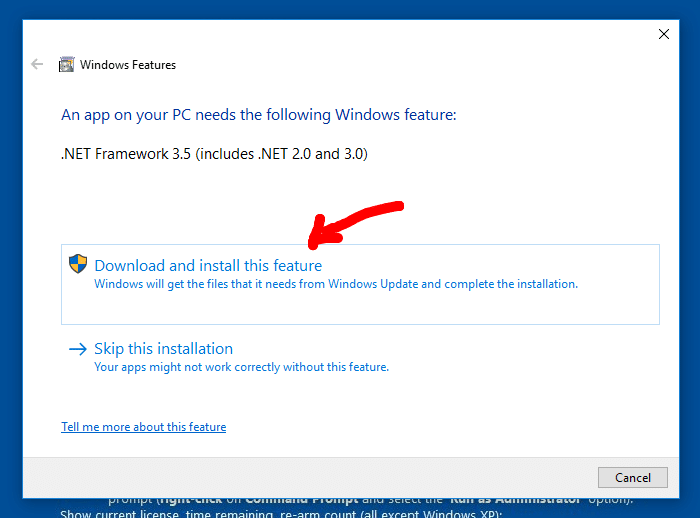
For Windows 7 and above, you might get a dialog box that automatically installs .Net 2.0. Please proceed with the installation and follow the steps.
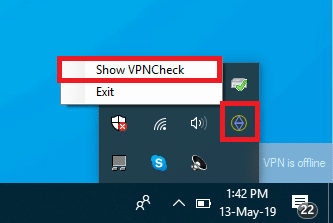
The software resides in the Tray area. Right-click on it, and select the Show VPNCheck option.
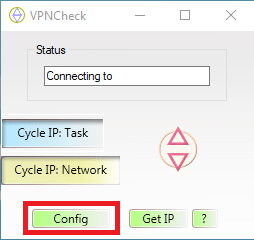
In the interface of the software, click the Config button.
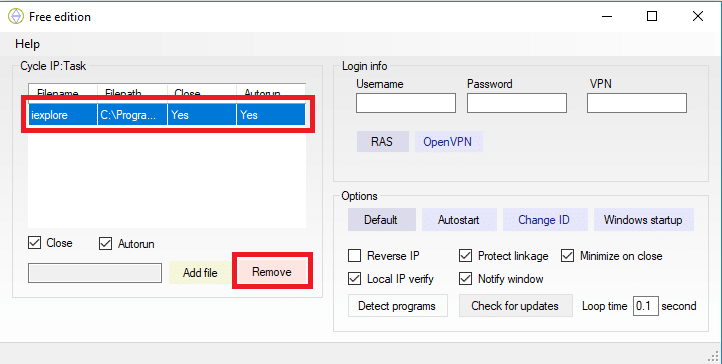
If you see any default entry under Cycle IP task, delete it by clicking on the item and then clicking on the Remove button. If there are no such default entries, you do not need to do this.
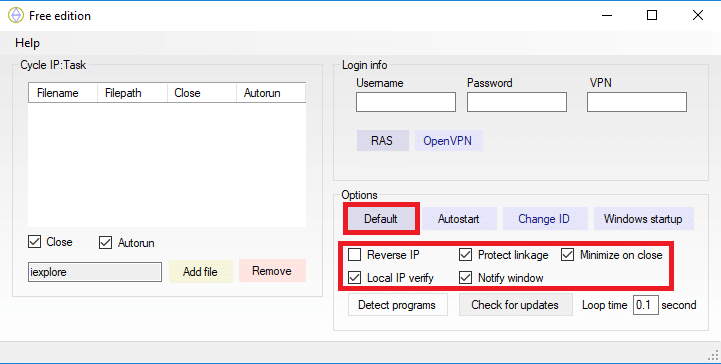
Under the Options tab, click the Default button and keep the options checked/unchecked exactly as shown in the screenshot.
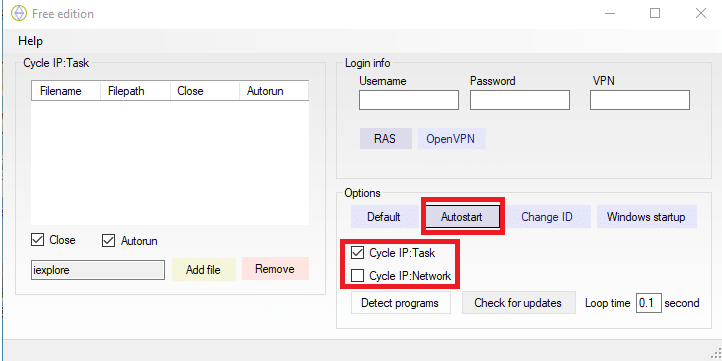
Click ‘the Autostart button and configure the options as shown in the screenshot below.
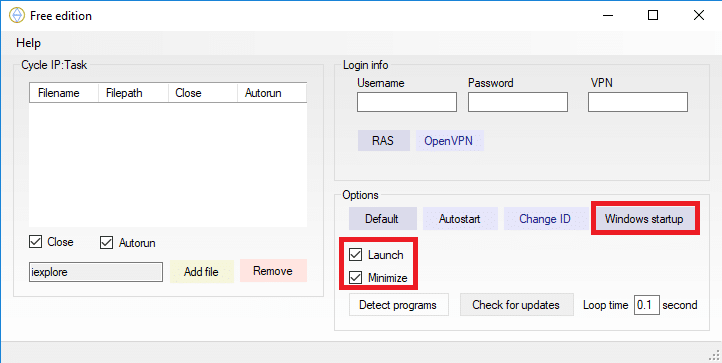
Click on the Windows Startup button and configure the options as shown in the screenshot below.
Afterwards, configure the web browsers that you want to use with the VPN. Click the Add file button under the Tasks tab.
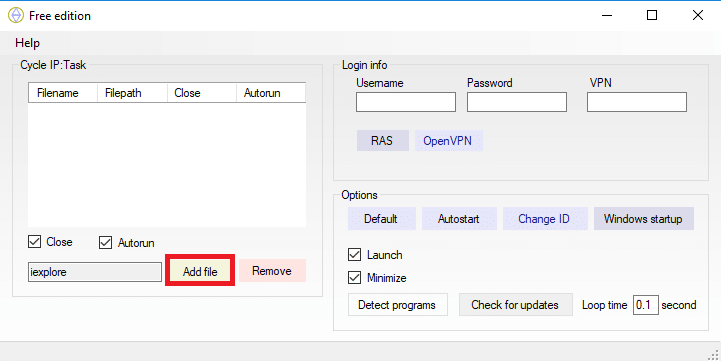
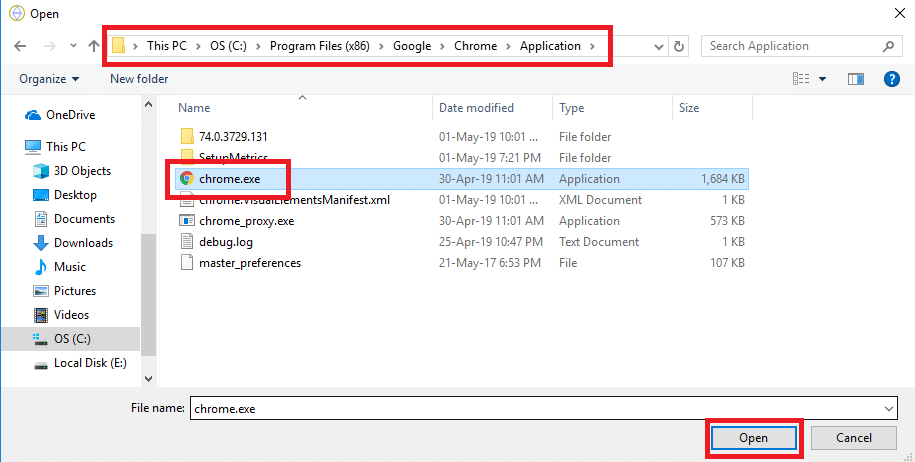
On the popup window, navigate to the folder in your C: drive where you have your browser installed and select the .exe file and click the Open button.
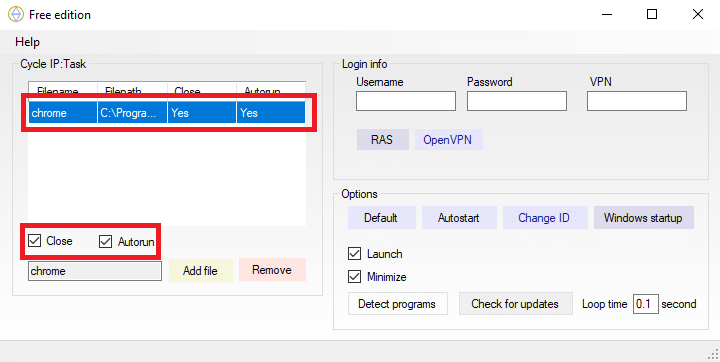
Afterwards, you will see that the browser program is included under the Cycle IP: Task tab. Select the row of the program, and tick the checkboxes for Close and Autorun.
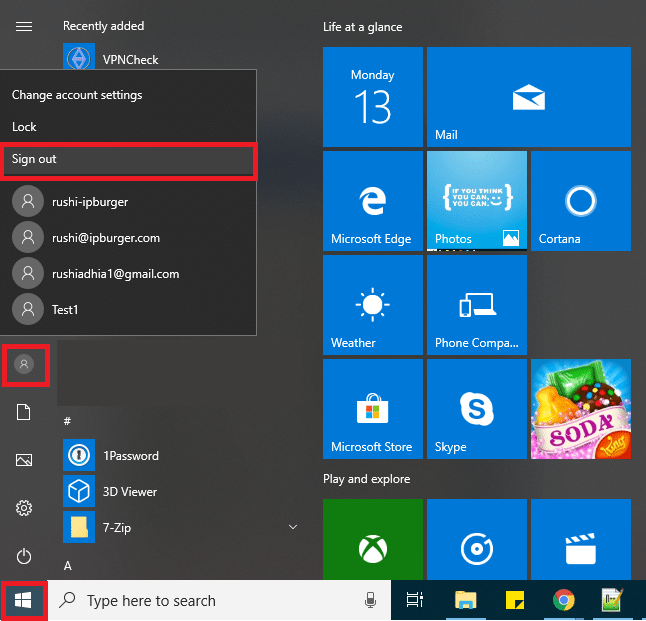
Close the program and sign out from the current user, and log in again. Please don’t skip logging out and logging in as this is a crucial step.
Now you have successfully set up the Kill Switch.
Kill Switch monitors your VPN connection and it automatically launches the web browser when a successful VPN connection is established. It also automatically closes the web browser whenever the connection is broken/disconnected. That way you never have to worry about leaking your real IP.
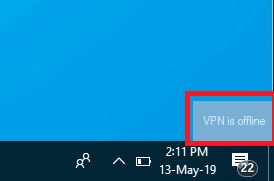
Test it out a few times by manually connecting/disconnecting with the VPN. It also shows a layover on the screen whenever the VPN is offline.
Kill Switch for Android
This kill switch works with Android 7.0+ OS version.
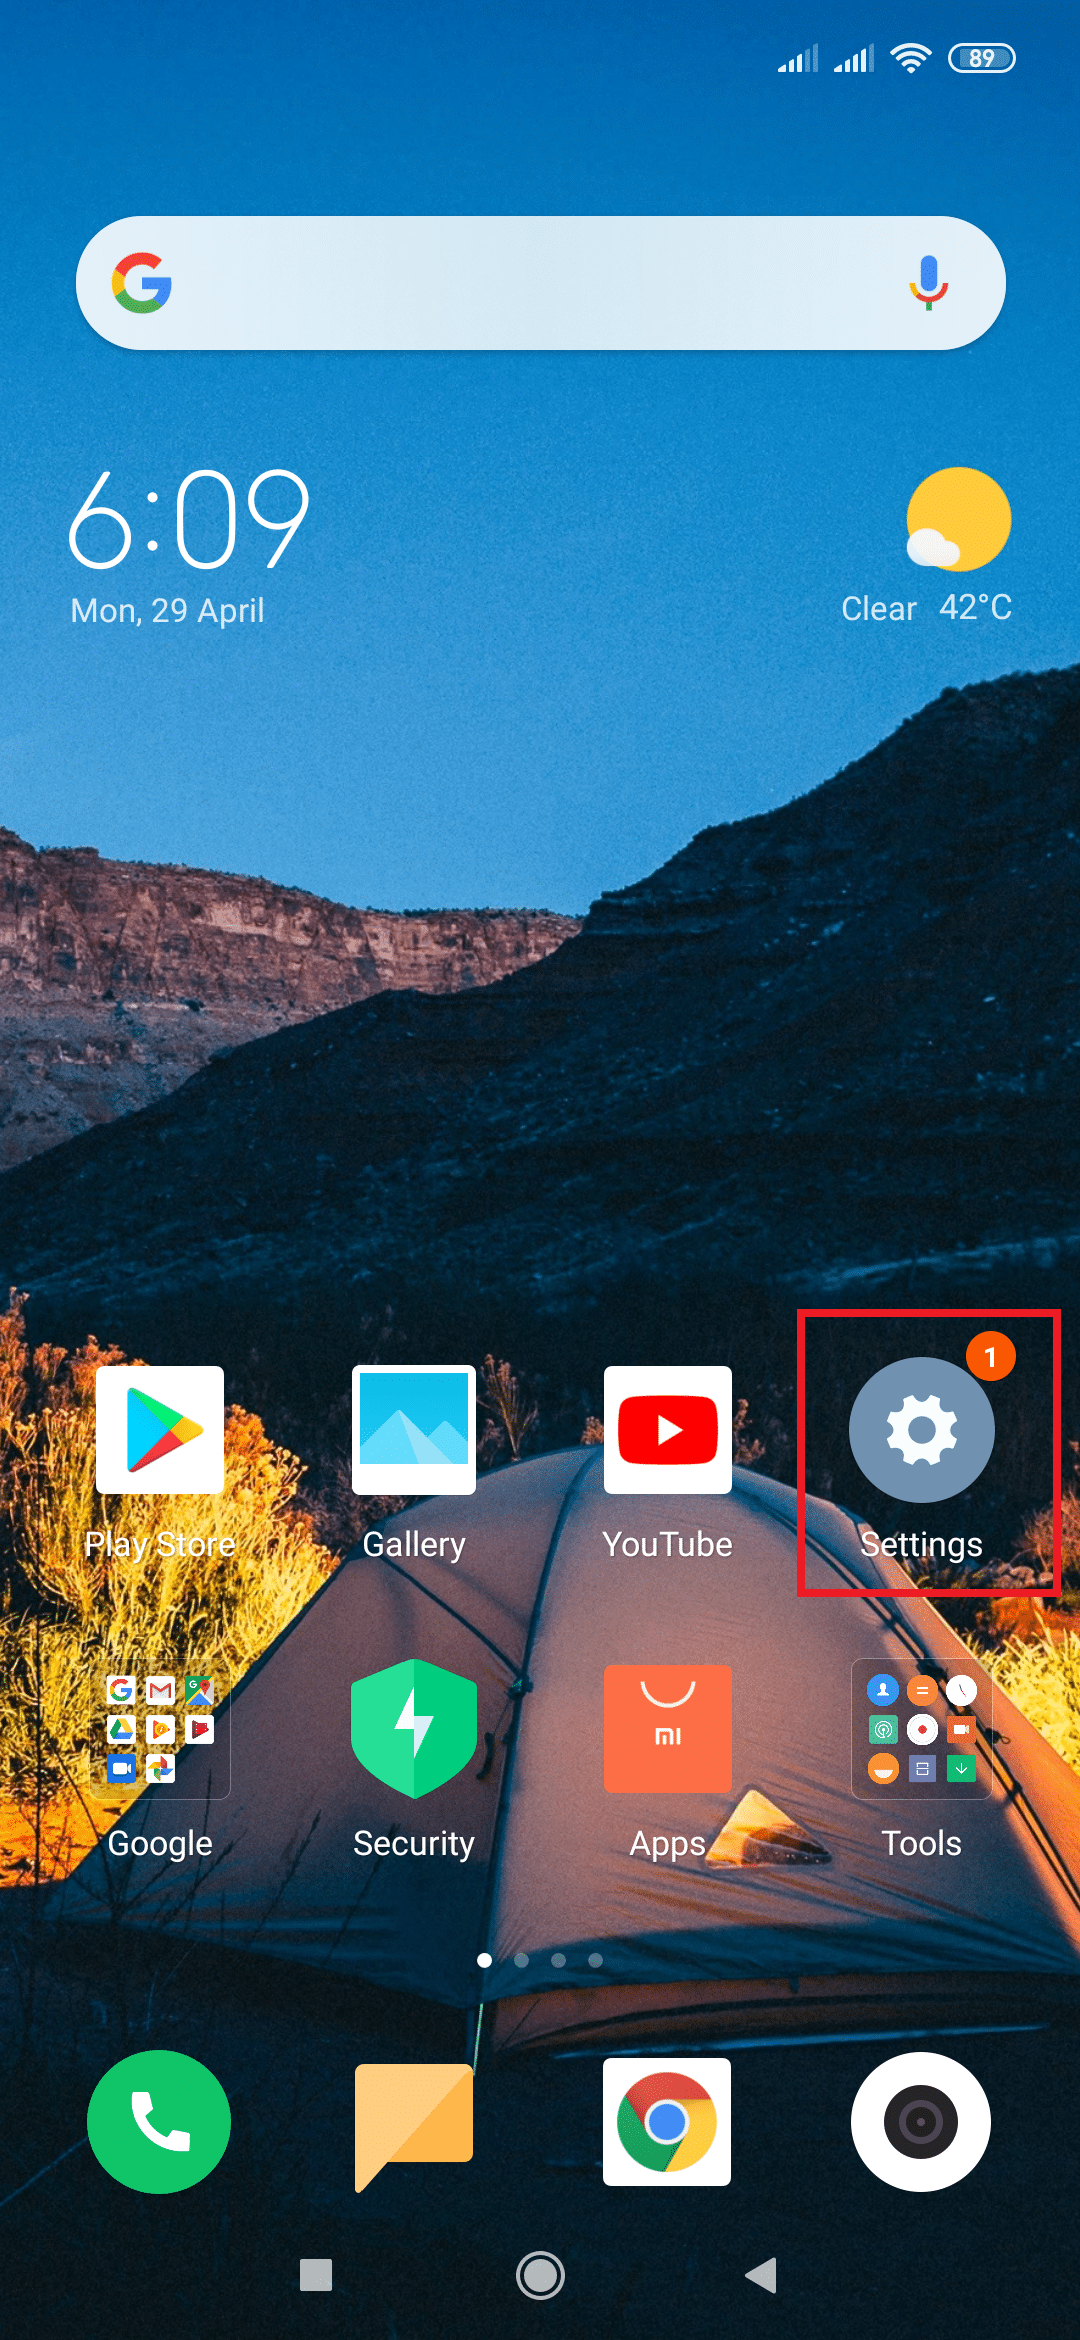
Open the Settings on your Android device.
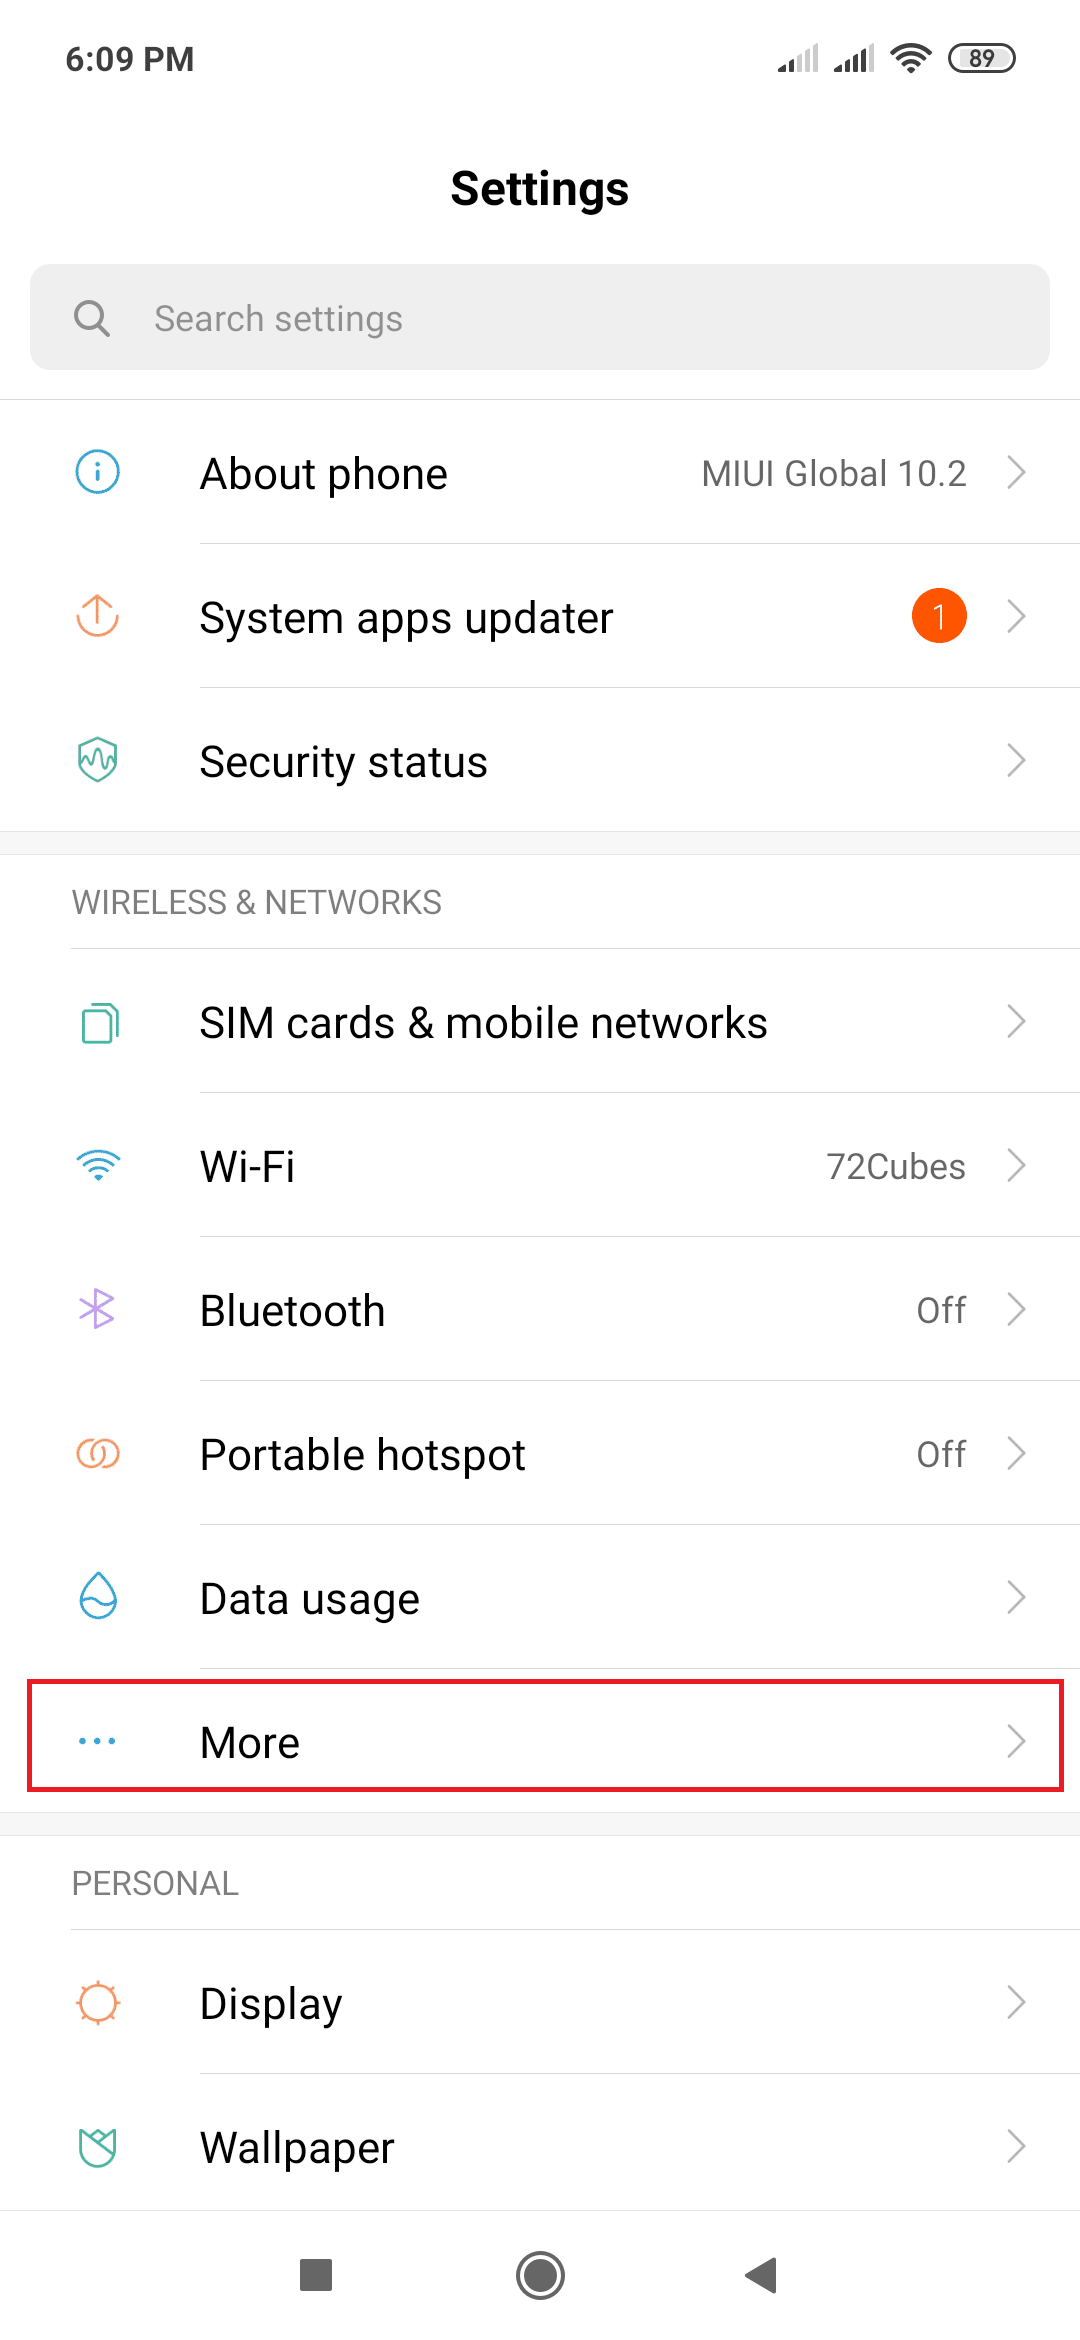
Under Wireless & Networks, click on More option.
Select VPN.
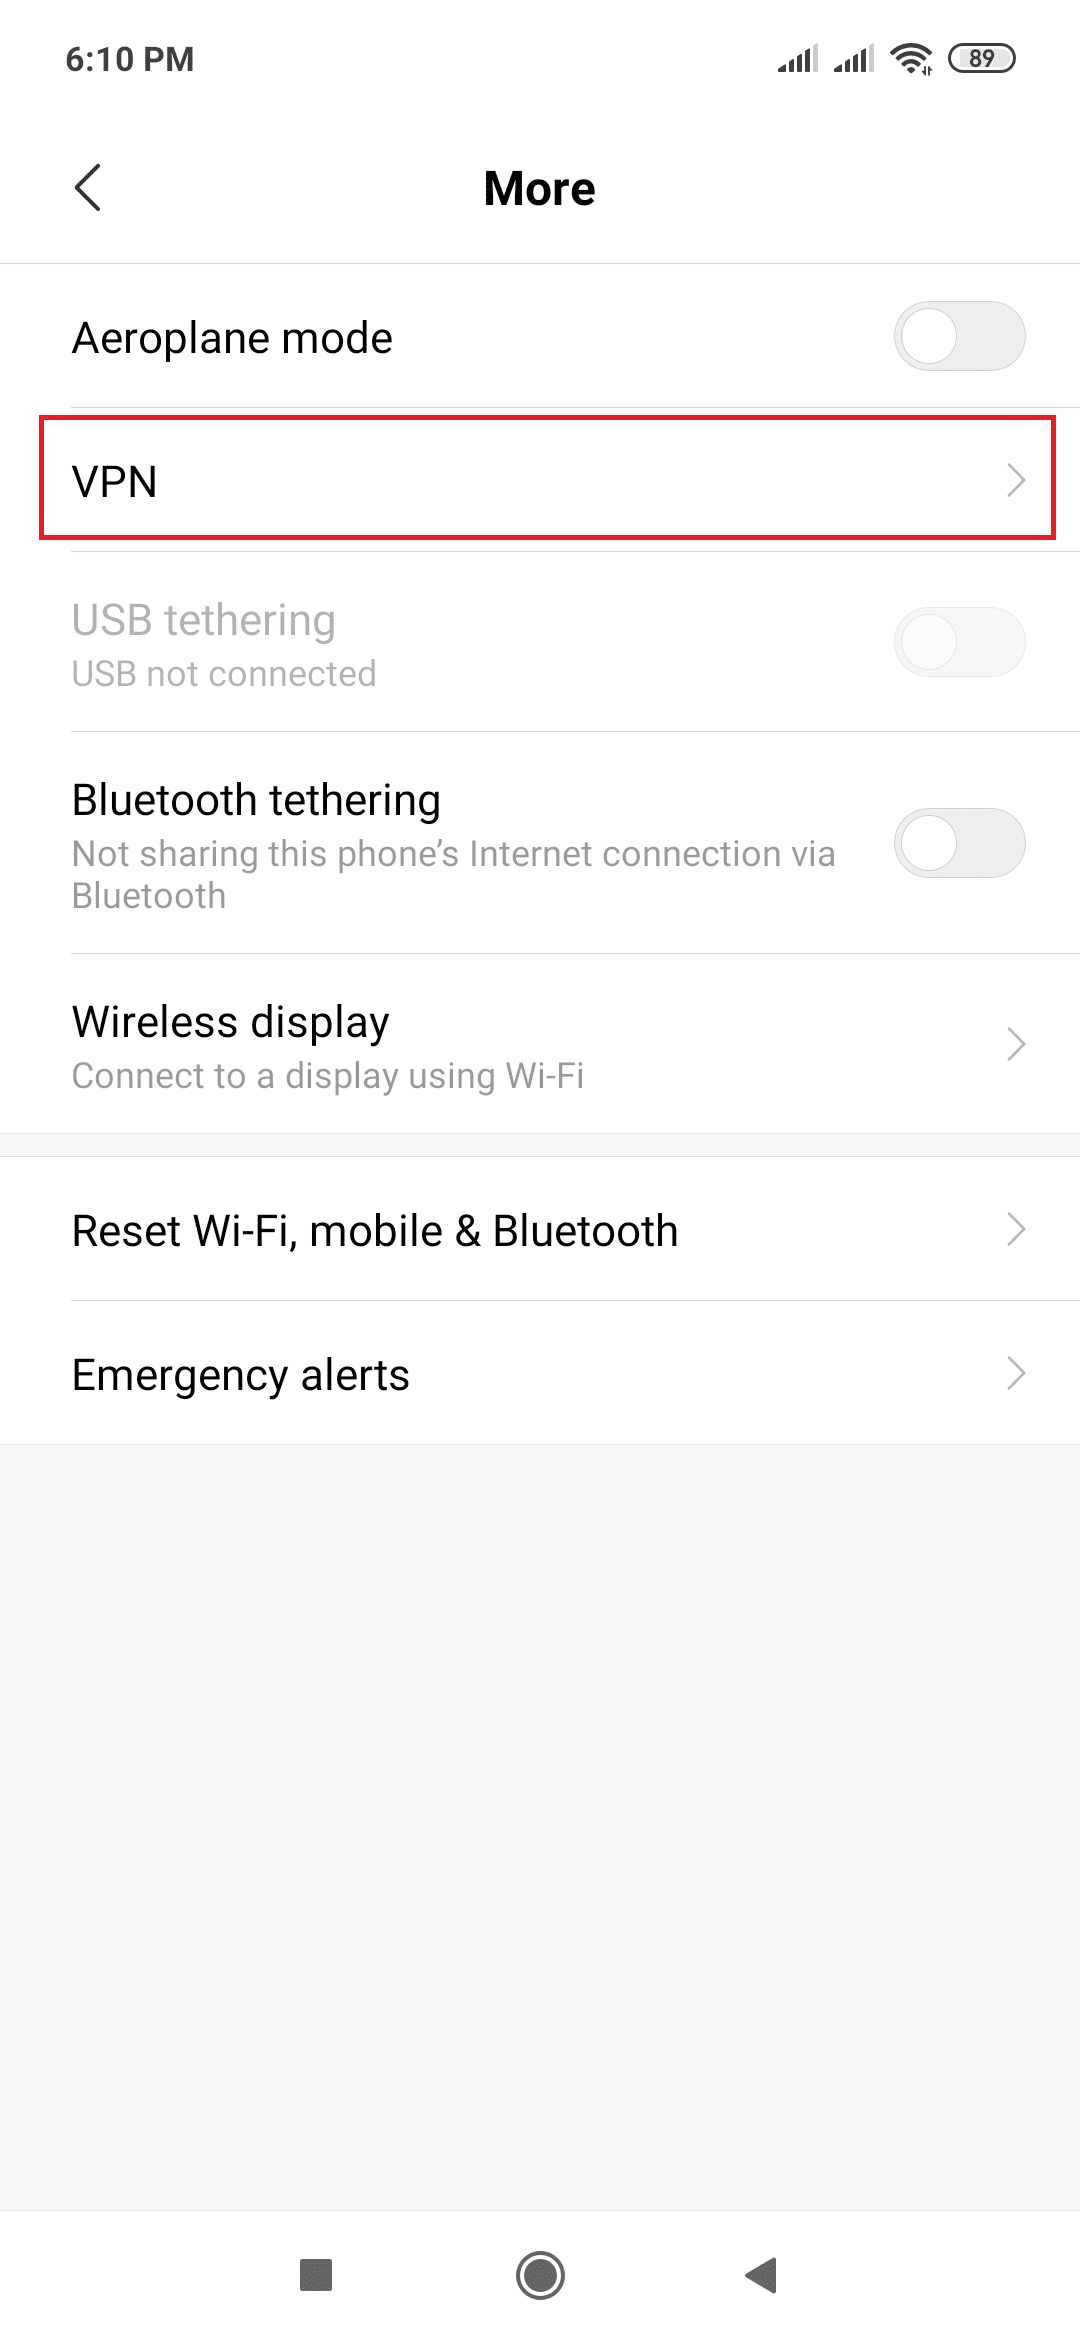
Click on the Clog icon next to OpenVPN Connect
Toggle on the Always-on VPN switch and Block connections without VPN switch.
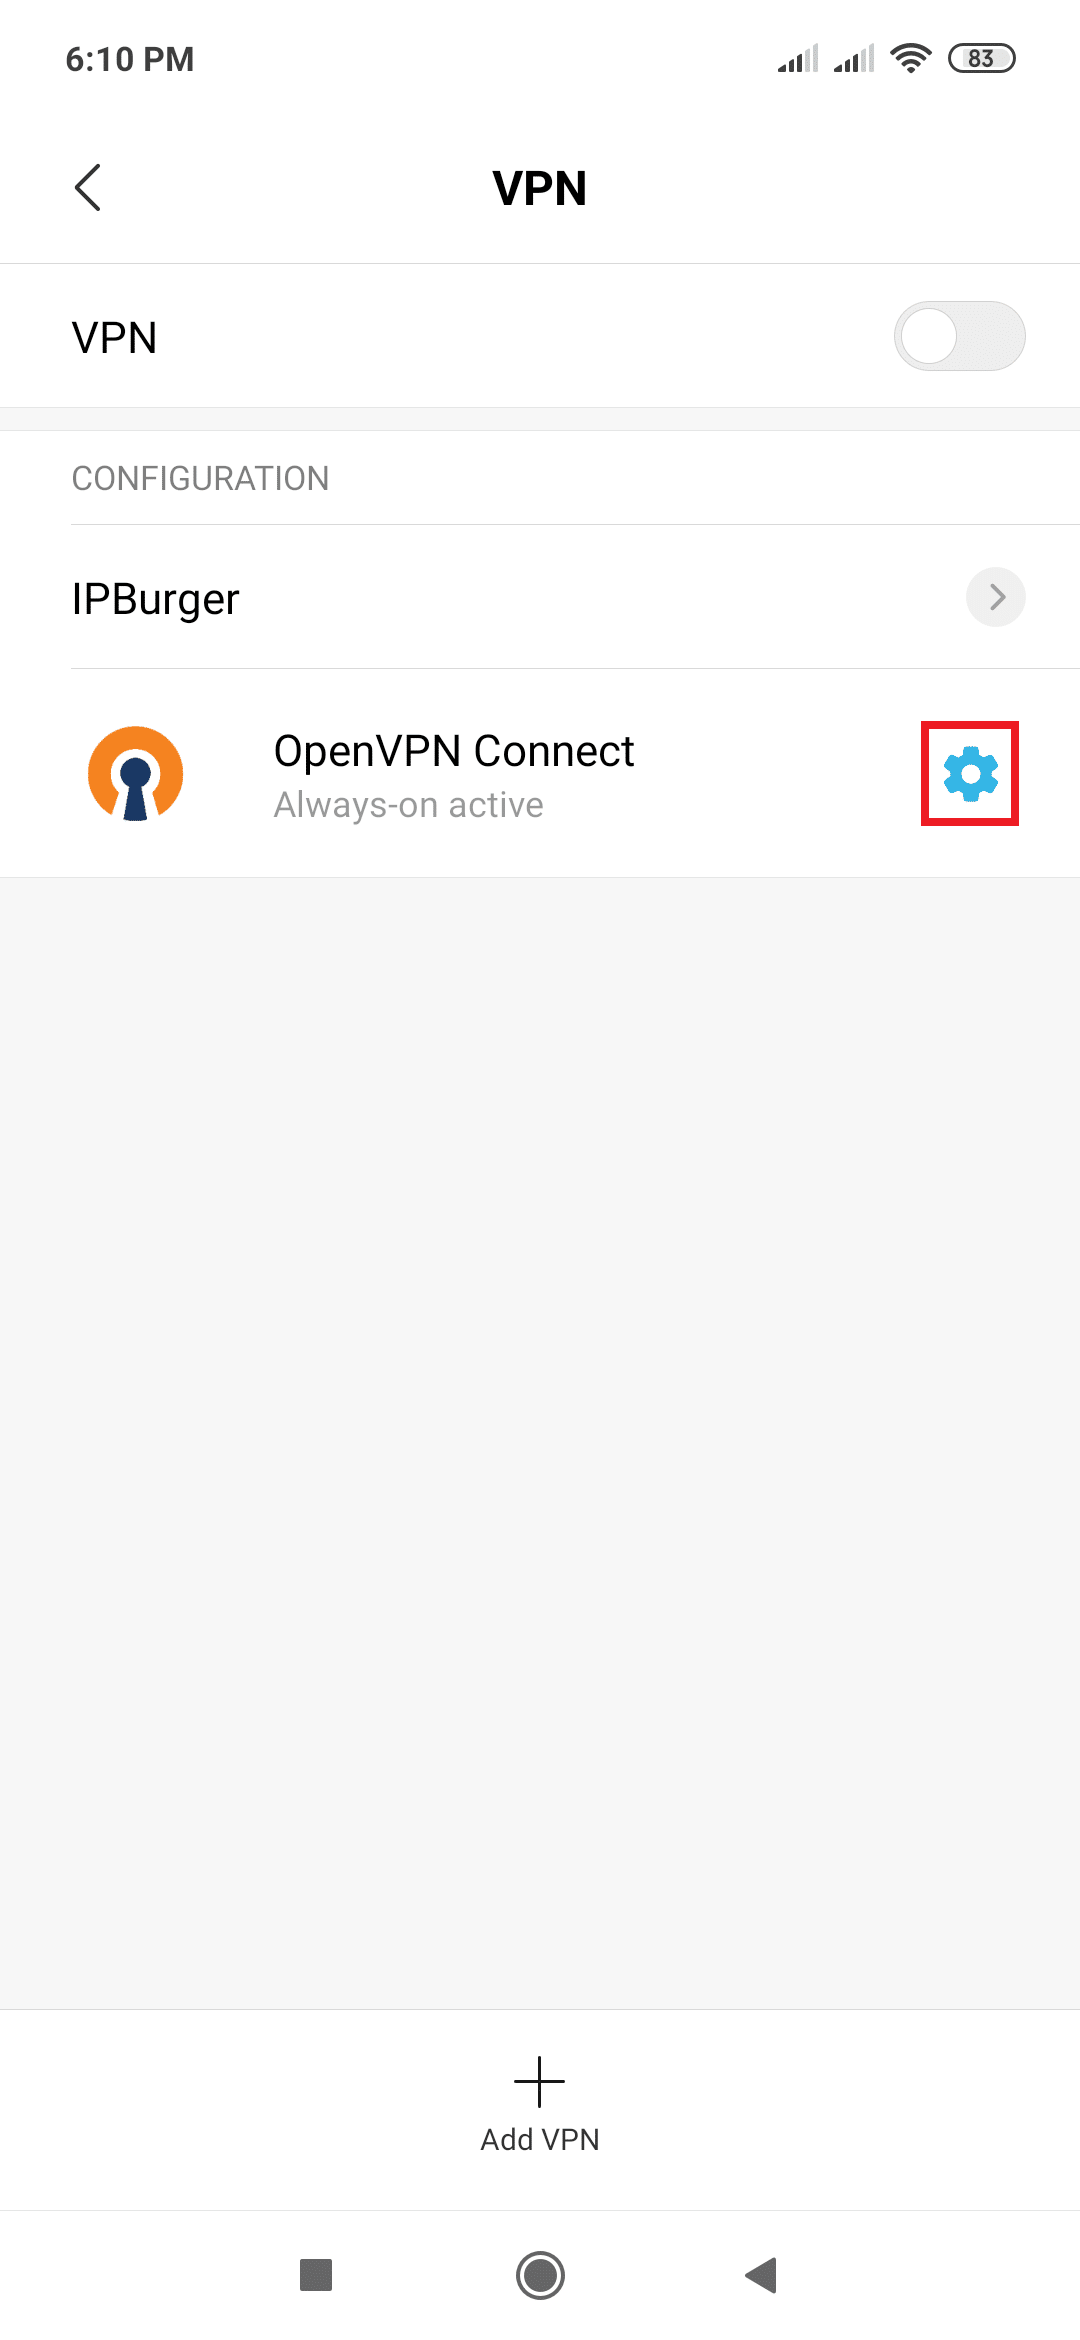
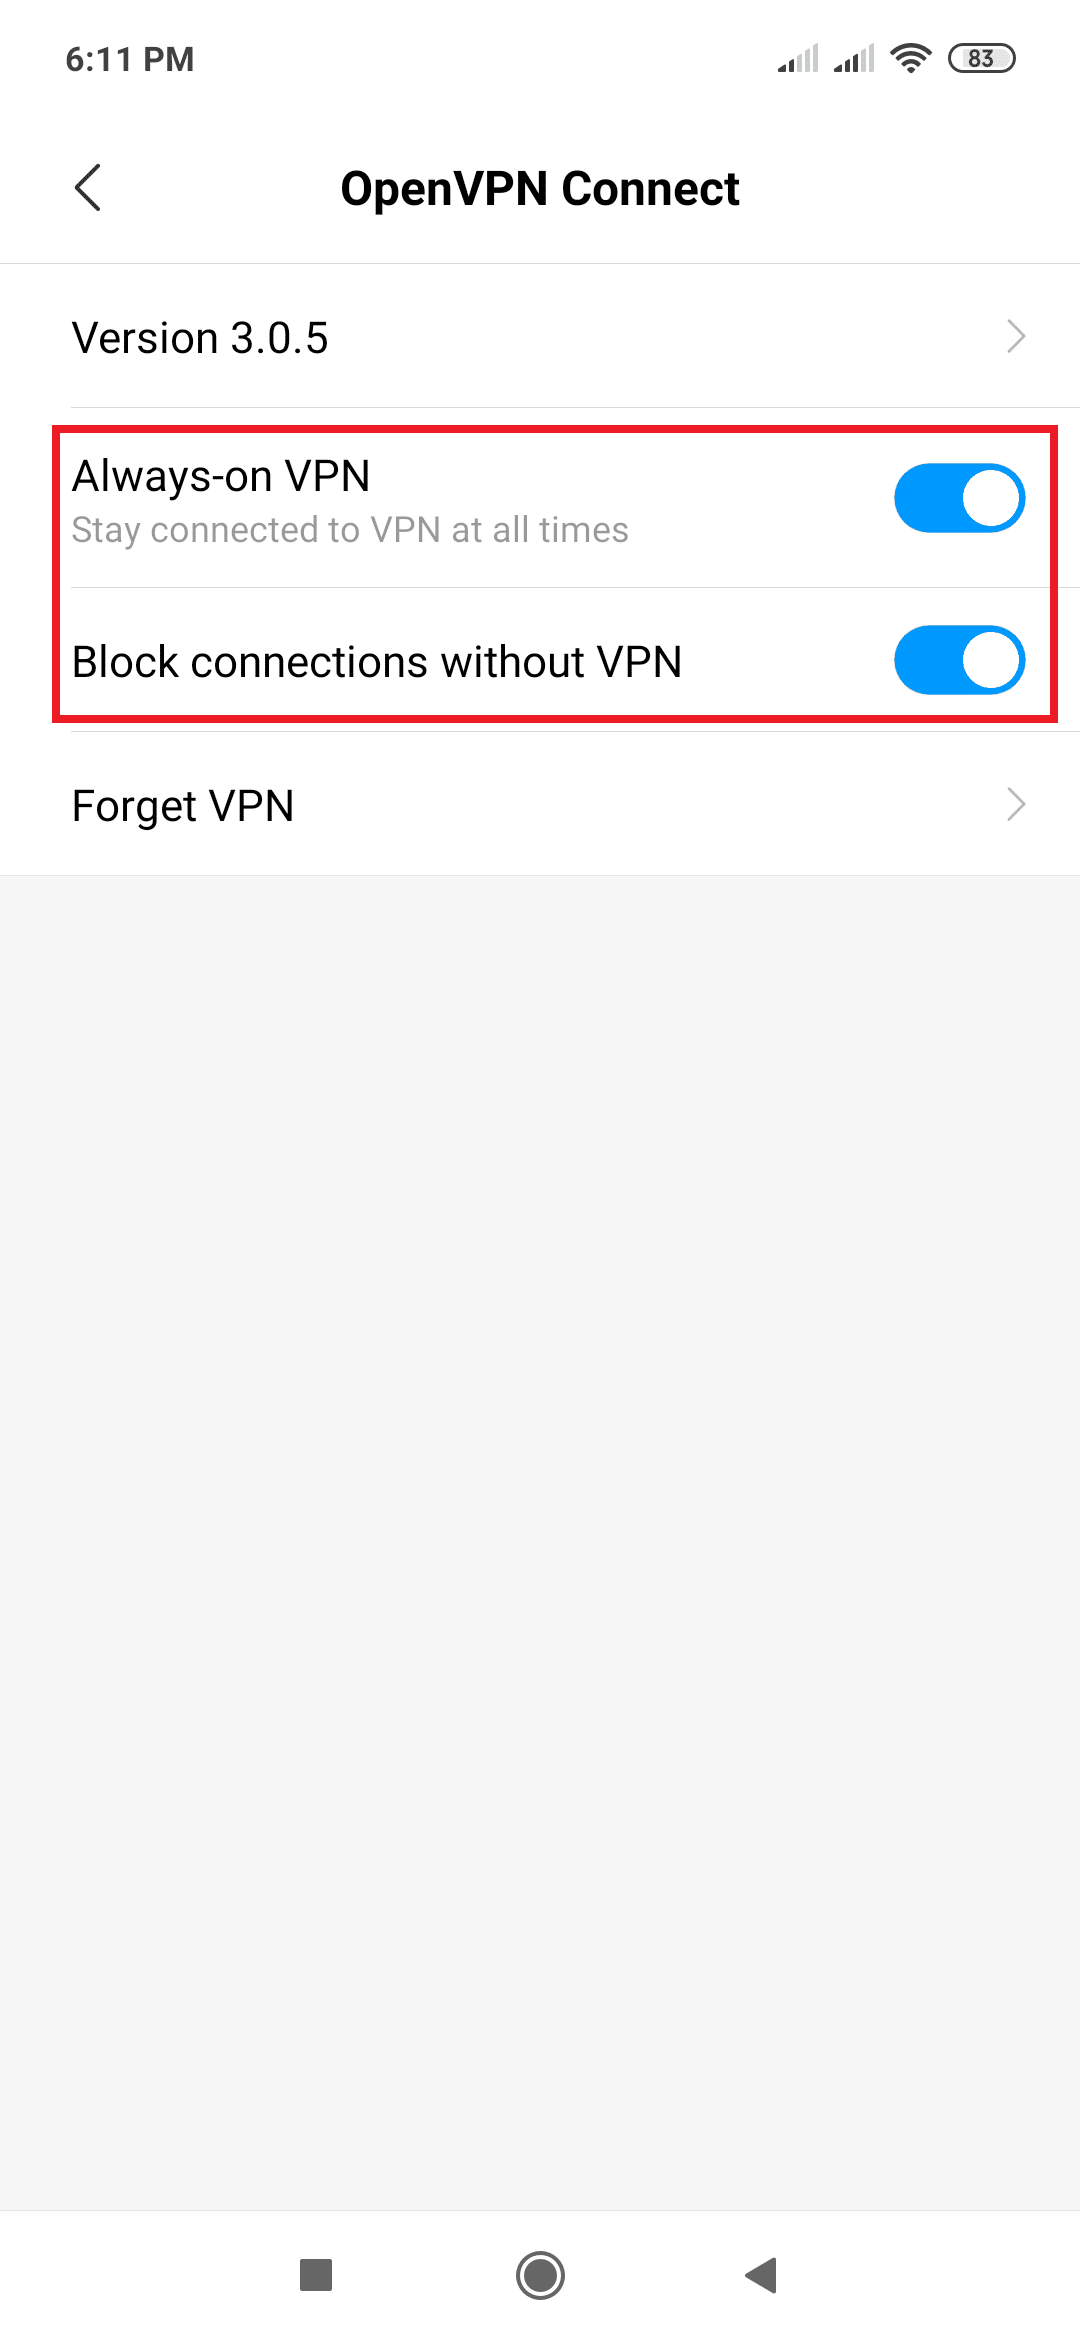
With these settings, you won’t be able to use the Internet without a VPN. If you want to use the normal Internet without VPN while not using your account, you need to disable this settings.
For any queries, feel free to reach out to our Support, we are happy to help!